Interview with Rod Planck – Professional Nature Photographer and Photographic Instructor
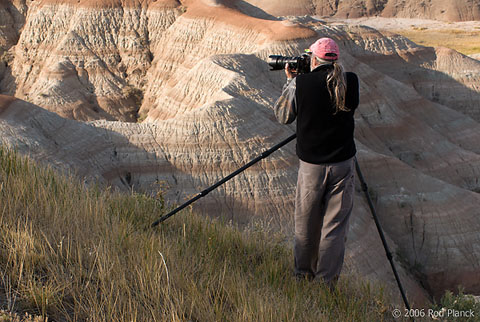
1. Rod, how and why did you get interested in nature photography?
I was interested in cameras at an early age, maybe even cameras more than photography.
My father always had point & shoot type cameras for family outings. He actually made some Super 8 movies and always had a Polaroid or Instamatic camera nearby. I became interested in cameras and then in what you could do with them. Early on, when I was about 14 or 15, I started working on acquiring a SLR system.
At the same time I was growing more interested in the natural world, and even though I didn’t know what a naturalist was at the time, I was actually becoming one. Little did I know that studying the natural world was going to become a lifetime pursuit.
Eventually the two interests grew into one, and in about 1979 it occurred to me that a person could actually make a living with their camera photographing things in nature.
2. You offer both nature photography workshops and tours. What is the difference and what is a typical day like on each?
The prime goal of the workshop is for education, learning the skills of becoming a better photographer. Obviously in workshops there has to be time photographing in the field built in, but along with the photo time, I put a lot of emphasis on classroom instruction.
On tours, I also provide a generous amount of instruction, but the lecturing I do on a tour is more spontaneous and done in the field while we’re out photographing. In both types of offerings, we typically do a morning field trip when the light is at its best and then another field trip toward evening.
During workshops, we have a classroom lecture session midday on topics such as exposure or composition. As the week progresses in a workshop, I spend more time evaluating and critiquing the students’ work.
On a tour, we strive to have longer field trips. We’ve actually had field trips that lasted 17 hours, but usually we have a mid-day break between the morning and evening field trips.
There are two features that I think set our tours and workshops apart from other companies. First, we really have two leaders because my wife Marlene is usually co-leading during most of our workshops and tours. Second, we have smaller class sizes than most tour companies, with different workshops and tours having varying maximum group sizes.
Ten is the top number in any of our offerings, but we’ve done tours where 6 people was the maximum number, and we’ve done specialized workshops with the group size limited to as few as 4 participants. We do this so that every participant is able to get individual attention to help them take their photography to the next level.
3. We don’t often hear about photographers’ spouses. You mentioned that you and your wife Marlene work together as team conducting your workshops and tours. How did the two of you get this right?
Marlene always worked at her own business from the start, from selling TV and print advertising to several years spent managing a furniture store. She’s worked with me as an assistant throughout my career. When I started selling photos she became the salesperson.
I am not a natural born salesperson, but Marlene is. She is a much better negotiator than I am. It’s in her background and she enjoys the process of give and take. There are parts of our business where we have equal opinions on such things as photographic locations, other guide services we might use at some locations and so on. On our tours and workshops, she does all of the organizing in terms of finding the hotels and other contacts to make things run smoothly.
4. We have seen some courses advertised that promise “All you need is one lesson and in just 20 minutes you can be taking astonishing photos like a Pro”. Rod, in your 30 years as a nature photographer, have you learned of any short-cuts or quick fixes for improving photography skills?
I don’t understand what those quick fixes would be. I haven’t found too many shortcuts in my career. To be a consistently good photographer is not an easy thing to do.
It takes time to learn about your equipment and learn the fundamentals of photography. However, there are a few things you can do to improve your technique that will render immediate results, such as using a tripod instead of hand-holding your camera. Mostly though, it’s hard work and a lot of time that are required, not short cuts or quick fixes.
5. About 20% of the photographs in your book Nature’s Places have been taken with a tilt/shift lens. What advantage does this type of lens provide for your landscape and flower photographs?
First of all, tilt/shift lenses are probably the most often purchased piece of equipment that ends up never being used correctly, or for the correct reasons. A tilt/shift lens can turn your SLR camera into a very simplified view camera, but there are a lot of misconceptions out there on what can and cannot be done with a tilt/shift lens.
Quite frankly, my photography wouldn’t look the same without utilizing this tool. In landscape work, the use of a tilt/shift lens allows me to put closer foreground elements in my photographic composition, while at the same time keeping background elements sharp.
In flower photography, I sometimes use a tilt/shift lens to maintain sharpness through an entire field of wildflowers, but also you can use them for limiting the sharpness to one band or one area of the image.
Tilt/shift lenses are a powerful tool that I’ve been using since the early 1980s. I started out with a Canon system, when they offered a 35mm tilt/shift lens. When I started using a Nikon system, it was an old manual style lens that you could have the back cut off of it and have a Nikon mount put onto it. I had that modification done and used it with my Nikon for years. The Canon EOS system came out with 3 tilt/shift lenses. For a while I actually used both Canon and Nikon systems at the same time, actually carrying around the extra weight of two camera systems, so I could take full advantage of the tilt/shift options of each.
Nikon now makes a set of three tilt/shift lenses, and I own the 24mm and the 85mm. There are some trips I wouldn’t use them on at all, so I don’t always have one with me. For example, I wouldn’t find one useful on a trip to Antarctica. But I wouldn’t think of taking a trip to someplace like Utah without taking a tilt/shift lens along.
It is important to remember that it is both tilting and shifting that is needed. There are lenses called shift lenses that are just perspective control lenses, but having the ability to just shift isn’t that useful to me. It is the tilt mechanism that I tend to use more than the shift mechanism.
I’ve just come out with my third e-book, Field Applications of Nikon PC-E and Canon TS Lenses, available at www.rodplanck.com that deals with tilt/shift lenses in detail.
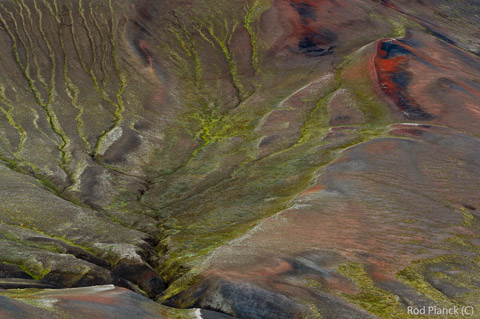
6. You spent ten mornings stalking muskrats by canoe, three days pursuing a northern hawk owl, and days habituating pronghorns and even a collared lizard to your presence. You’ve also returned many mornings in a row to a site where you had a creative vision of a great landscape, but had to wait for the right weather and lighting before you ever took a photo. What types of conditions do you sometimes have to endure out in the field to get the photographs you want?
I don’t think I’m really enduring anything. I’ve not worked on a lot of assignments, so I’m almost always choosing my own subjects to photograph. In terms of my nature photography, it may make the story behind a photograph more interesting to say that it was 20 degrees below zero Fahrenheit, or that I spent 3 days photographing a certain subject, but I’ve never looked at it as enduring something—I’m doing something I want to do. If I’m not comfortable and don’t want to deal with cold or wind or rain, then I go do something else.
Take biting insects for instance. If I want to photograph Michigan’s native orchids, I’m going to have to deal with hordes of mosquitoes and black flies. The two go hand in hand. If I didn’t like dealing with the insects, or the cold weather, or the standing around outside, I wouldn’t be much of a nature photographer.
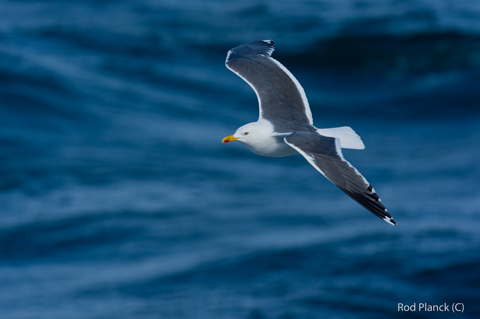
7. You’ve said that it’s important to stay calm and not getting over-excited when you come across a subject that inspires you. What is the importance of not getting too excited?
If the subject matter inspires you, that’s a good thing. Inspiration and subject is kind of the same thing almost. I don’t think you can photograph anything well that didn’t make your heart beat a little faster. The balancing act is remaining excited over your subject matter without losing sight of the moment and getting rattled. This happens more in wildlife photography, but it can also happen in landscape photography, when you know the light is only going to last a certain way for a short period of time, and in those cases it’s almost like photographing a wild animal exhibiting a behavior you’re excited about capturing.
I certainly have made a lot of photographs where I was excited about what I was viewing. There were times early in my career when I messed up a photograph because I got over-excited. I learned over time to stay excited, but at the same time remember that the camera is in my hand, and remember to do everything right to get the photograph.
As you gain more experience, you should have less problems with letting excitement get in the way of your ultimate goal of creating world class photographs.
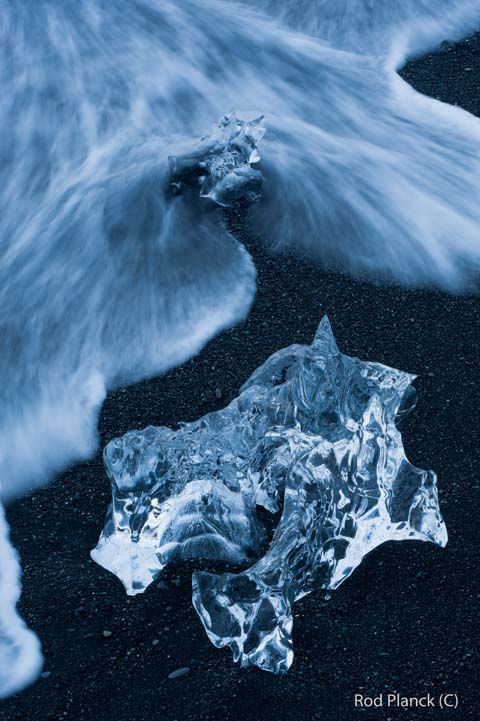
8. You’ve coined the term “intimate landscape” to describe the smaller-scale landscapes that you’ve made a specialty of your photography. Could you explain this term?
First of all, my learning the knack or the art of seeing smaller scale was dependent on where I lived when I was starting out in nature photography. If you live somewhere where you can climb a mountain and look out over miles of rolling countryside, or go to the edge of the ocean and look out over a large body of water, that’s what you think of as a landscape.
I’ve lived in forests my whole life. I certainly visit places where I can see great distances, but living someplace as forested as the state of Michigan forced me to see landscapes in smaller dimensions, from a smaller perspective. My friend John Shaw once said that if you can photograph in the state of Michigan you can photograph anywhere on the planet. He was in part referring to the weather, but also on the restrictions on our visual perspective because of the forested nature of the countryside.
I learned that creating simplicity out of chaos was something I had to pick up on quickly as a young photographer. Most second growth forests are anything but simple in appearance. You have a lot of brush near the ground. You have vertical lines, diagonal lines, lines on the ground moving horizontally. It forces you to simplify, sometimes from a forest down to a single tree.
Simplifying doesn’t mean eliminating all other elements in a photograph, other than the subject, into an out-of-focus background. It means being able to look at a forest of a thousand trees and visualizing the dynamic image within, one that may include only a dozen trees, or even just one tree.
The way I photograph in Michigan I apply to every place I photograph, whether it’s in the Arctic or the Antarctic, or Utah, or South Dakota. It’s not always important to include every single element in front of you in your photograph, but it is important to find the most dynamic elements and isolating those. The idea of intimate landscape, I could probably apply to everything I photograph, whether it is a butterfly, a polar bear, a mountain, or a flower. In one way or another, every photograph is a simplification of a much larger picture.
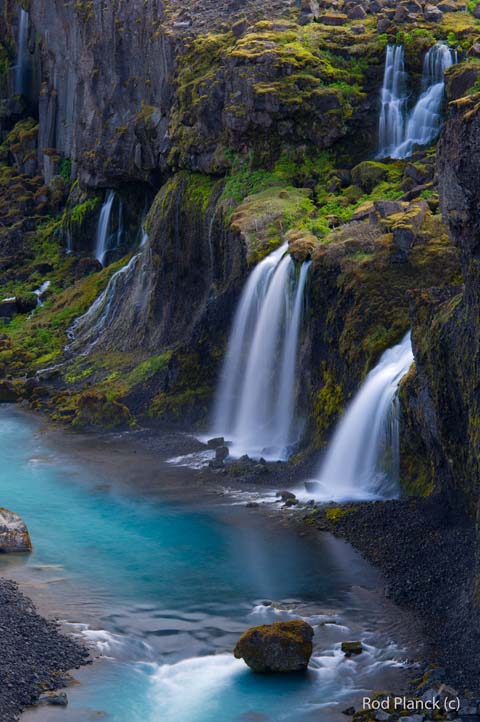
9. Some conditions last for just minutes, such as dew on a butterfly, while others are never to be repeated. On page 48 of your book Nature’s Places you have a photograph of fog and autumn reflections on a pond, and five minutes after you took the photograph the fog lifted, the breeze came up and the opportunity was gone. Since that day you have revisited the site on several occasions, but have not made another image there. What is the message here?
The message is not to take any moment or subject in nature for granted.
I once photographed a short-tailed weasel in my backyard. I remember the date, December 13. The weasel had been hunting mice in fluffy snow in my yard all morning and afternoon. It was quite frustrating until late in the afternoon when I finally made several good images of it.
I can remember thinking that I would be photographing weasels in my yard for the rest of the winter. But actually that was the last weasel I’ve seen in my yard—all I’ve seen since are tracks. The point is not to take great moments in nature for granted.
10. In your book you mention that photographers should strive for simplicity to strengthen composition but they also need to have an element of complexity. How do these two elements fit together?
A balancing act is always needed. There’s always a need to simplify. I’m not saying that what you need is always to have one flower, for example, against an out-of-focus background.
The number one fault I see is people choosing subject matter that really isn’t a subject, or taking beautiful subject matter and turning it into a chaotic mess. Learning how to create that balance between simplicity and complexity is something that is learned over time, but is essential to becoming a better photographer.
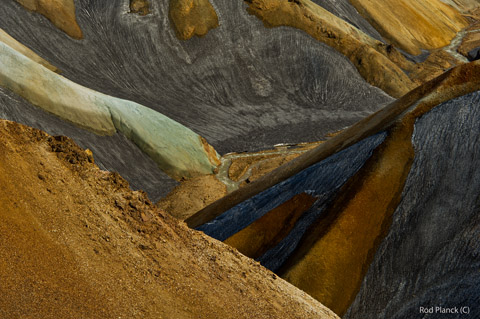
11. One of your more recent techniques is multiple exposures with up to ten exposures making up one photograph. How does this technique enhance a photograph?
I use multiple exposures in two ways. To the best of my knowledge, only Nikon Pro-sumer and Pro-bodies, cameras like a D700 or D300, or D3X allow you to shoot multiples. There are cameras that allow you to do double exposures, but I personally have no interest in doing that. I’m interested in doing multiple exposures.
There are two reasons I use multiple exposures:
One is to use the multiple exposures to create a type of movement or increase blur in a static scene. When photographing a waterfall, using a tripod, I shoot a 1-second exposure to give the water a blurry look, but I still might not get the desired effect, the silky appearance of the moving water, that I want. The following example is a true multiple exposure.
It is software based, inside the camera—the camera has to process these ten images together. Nothing else can move in the photograph, so you must have a sturdy tripod, you can’t bump it, there can be no wind moving the vegetation around. You’ll shoot your ten multiples, but what you’ll see is just one image. Humans have never really photographed moving water the way it looks, but multiple exposures allow you to approach this look.
Another reason to use multiple exposures is to create a more “painterly” look to my photographs—the classic example of where I would do this would be while I was hand-holding the camera while photographing a field of wildflowers.
For something to be a strong multiple it needs to be a strong composition to start with. It has to be a situation where you would make a more normal composition if the conditions were better. But maybe it’s a little windy or the light’s a little flat, and I’ll hand-hold, and shoot ten exposures while moving the camera around a slight amount. And I’ll experiment, maybe doing 20 or 30 different versions of the same scene. This is something I do that is totally outside the realm of my usual nature photography, using artistic license to create a different effect.
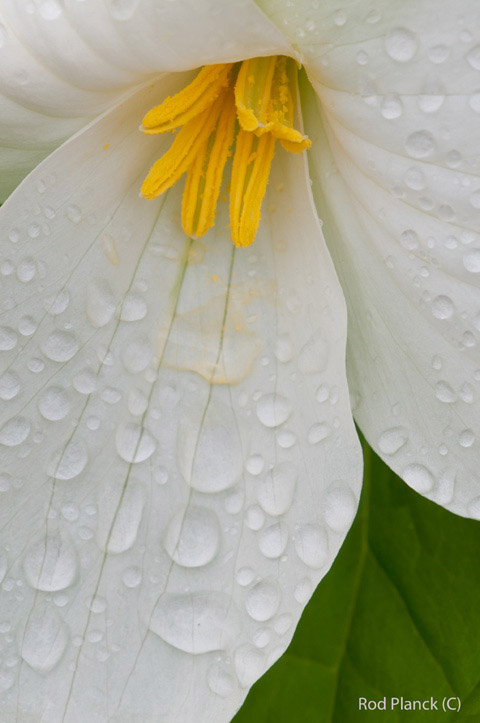
12. What are your top 3 tips for macro/wildflower photography?
1) Not to underestimate the importance of longer focal lengths when photographing animated subjects. I have a big fear that camera manufacturers are going to stop making longer focal length macro lenses, and rely mostly on their 60mm and 105mm models. This would be a big mistake. The reason these lenses don’t sell as well is that not enough photographers understand the advantages of the greater working distance and simplified background that actually make these lenses easier to work with.
2) Use a tripod that goes low to the ground without inverting the center post, which often will mean that it doesn’t even have a center post.
3) Don’t underestimate the importance of a crop body. I currently use two formats, the so-called “full frame” or 1” x 1.5” format offered by the D3S, but I also use a D300S which has a crop factor of 1.5 times smaller than my D3S. For close-up work on insects and flowers, I’m using the crop body with a longer lens, which means I can be farther away, because the image is obviously larger with a crop body than it is with a full frame body.

13. What are your top 3 tips for shooting better grand landscapes?
1) Match the focal length to your perspective. Finding a great overlook is just part of landscape photography. You need to find the focal length that lets you capture and express what it is that you’re inspired by from that perspective.
2) Don’t rely on zoom lenses with extreme focal length ranges. These are great travel lenses, but you have to remember that a lot of zoom lenses, such as 18-over 200mm might be good for photojournalism or traveling, but most of them do not render the resolution needed for good landscape photography.
3) Don’t overuse the cropping tool offered by Photoshop and some other software. Compose your landscape image in the field. In wildlife photography you can be forced to use a cropping tool to correct crooked horizons or take care of problems that developed because things that were happening quickly while you were shooting an image.
But in landscape work, if you can’t compose a photograph of a static mountain in unchanging light or a mountain that isn’t running away from you, you’ve got problems. You need to learn how to slow down and compose the photograph based on the view in front of you, rather than use the crop tool in Photoshop.
About Rod Planck . . .
Rod Planck has been a professional nature photographer and naturalist for over thirty years. His most recent instructional offering is a series of e-books on Exposing RAW Captures, Illuminating Small Creatures, and Field Applications of Nikon PC-E and Canon TS Lenses.
Rod’s images have appeared in various magazines, such as Audubon, Sierra, Natural History, and Backpacker, among others.
The book Nature’s Places is dedicated exclusively to Rod’s images.
Rod has had instructional articles and portfolio pieces appear in Outdoor Photographer, Birder’s World, Nature’s Best, Photolife, Shutterbug, and The Nature Photographer. Rod has worked on print advertisements with such clients as Nikon, Fuji, and Kodak.
Rod has a deep respect for the natural world, which is the focus of his photography. His programs do not contain images of captive animals from game farms or zoos, and he uses the computer as a tool to accurately portray what he sees in the field, and not to artificially enhance his images.
To learn more about Rod Planck, to see more of his superb images or to find out about his workshops and tours, please visit www.rodplanck.com
All images copyright Rod Planck Photography
Return from Rod Planck to Interviews page
Return from Rod Planck to Kruger-2-Kalahari home page
To make a safari rental booking in South Africa, Botswana or Namibia click here
"It's 764 pages of the most amazing information. It consists of, well, everything really. Photography info...area info...hidden roads..special places....what they have seen almost road by road. Where to stay just outside the Park...camp information. It takes quite a lot to impress me but I really feel that this book, which was 7 years in the making, is exceptional." - Janey Coetzee, South Africa
"Your time and money are valuable and the information in this Etosha eBook will help you save both."
-Don Stilton, Florida, USA
"As a photographer and someone who has visited and taken photographs in the Pilanesberg National Park, I can safely say that with the knowledge gained from this eBook, your experiences and photographs will be much more memorable."
-Alastair Stewart, BC, Canada
"This eBook will be extremely useful for a wide spectrum of photography enthusiasts, from beginners to even professional photographers."
- Tobie Oosthuizen, Pretoria, South Africa
Photo Safaris on a Private Vehicle - just You, the guide & the animals!


New! Comments
Have your say about what you just read! Please leave us a comment in the box below.