Panning
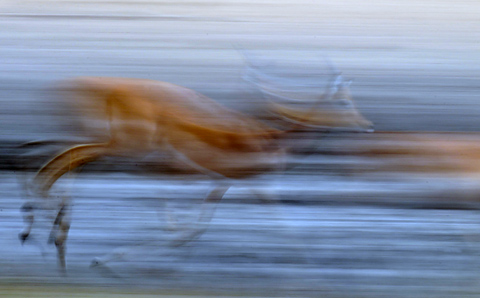
Panning is a photographic technique that can be used to make very effective wildlife photographs depicting your subject's motion. They are also called 'motion blurs'.
The basic idea is that you move (pan) your camera along with the moving subject so that you end up creating a relatively sharp subject with a blurred background.
It is not the easiest technique to master but with a bit of practice and the right conditions you should get pleasing results.
An African safari will provide many appropriate animals to use as subjects. There are animals such as the giraffe, zebra, leopard and cheetah..
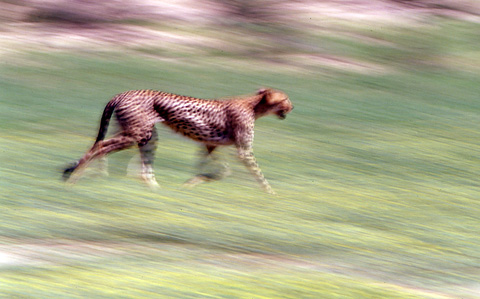
that have strong contrasts in their coats and there are others that have unique features or shapes (horns, manes and tusks) that make great subjects.
Also keep a lookout for opportunities to include dust or water being kicked up by the running animals as this will add impact to the photograph.
You subject should be moving in a straight path parallel to you - if the subject is moving toward or away from you then the photograph will not be as effective.
Try and use your tripod if shooting from a camp or your bean-bag and Panning Plate if shooting from a hide or car...
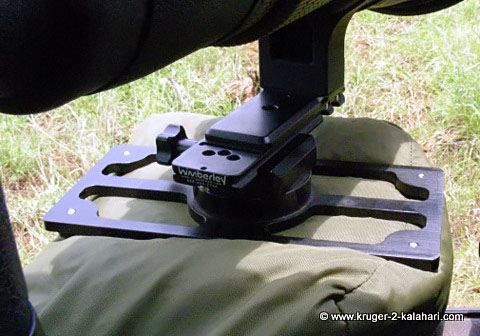
Hand-holding can also work but you must ensure you do not move up or down but just left to right, moving with the subject.
Twelve Tips on How to Shoot Motion Blurs
1. Set the program mode to Aperture priority
2. Set your camera's focus mode to AF-C for Nikon (AI Servo for Canon) and the release mode CH (Continuous-High) or CL (Continuous Low)
3. If your lens has VR or IS set the switch to 'normal' for Nikon (and mode 2 for Canon) as you want the horizontal motion to blur but not the vertical motion. Nikon's 'active' VR switch will stabilize both horizontal and vertical movement.
4. Set your ISO on the lowest - say ISO 100
5. Set a small aperture, say f/16 or f18, depending on the brightness of the day
6. Set a slow shutter-speed of about 1/30th to 1/15th second. Dull overcast days are best for pans but if the day is too bright and you cannot get slow shutter speeds then add a polarizer or neutral density filter to reduce the light and give you a slower shutter speed. If your subject is moving slow you would use a slower shutter speed to accentuate the feeling of speed. If the subject is sprinting (like a cheetah) you may need to use a faster shutter speed otherwise you could have a totally blurred photo.
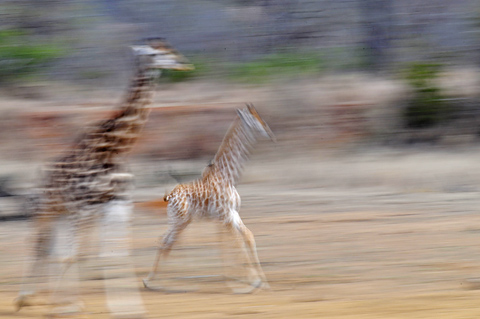
7. Position yourself in a place where your view of the subject will not be obstructed by anyone or anything else. Also consider the background of your shot. Even though the background will be blurred you don't want distracting shapes or colors. Single-colored or plain backgrounds tend to work best.
8. As the subject approaches track it smoothly with your camera. For extra support of your camera if you’re using a longer lens or are feeling a little jittery you might like to use a monopod or tripod with a gimbal head.
9. Focus on your subject's body or head and use the centre focus point and just keep tracking the subject while shooting
10. Pan (rotate your torso or move your arms) in the same direction of the subject's trajectory
11. Shoot a continuous sequence of images to ensure you get at least one that is pleasing. Keep in mind the your subject's head may be bobbing up and down so you will need to try and get it at the peak of the action when the bobbing has stopped - shooting in continuous-high will help you get this.
12. Once you’ve gently released the shutter continue to pan with your subject, even after you’ve heard the final frame has been taken. This smooth follow through will ensure the motion blur is smooth from start to finish in your photograph. No different to golfers, tennis players and snooker players who 'follow-through'!
A variation on the Pan Technique
You may want to experiment with your flash while panning. If the subject is close enough it will work - set the flash on Slow-rear and the camera release mode to Single-frame or CL as your flash most probably won't be able to keep up with CH! You may also need to dial in minus-half to minus-one stop flash compensation.
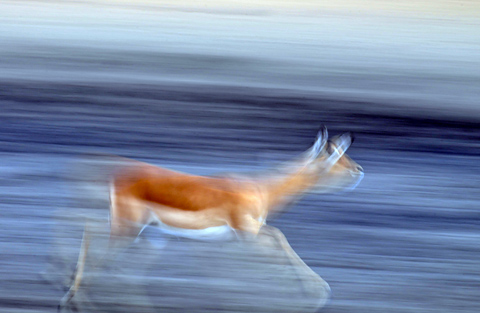
Another variation is to fix your camera on a tripod and as the subject enters your frame you press the release cable - this will blur the subject but not the background. It makes an interesting variation to having a blurred background...
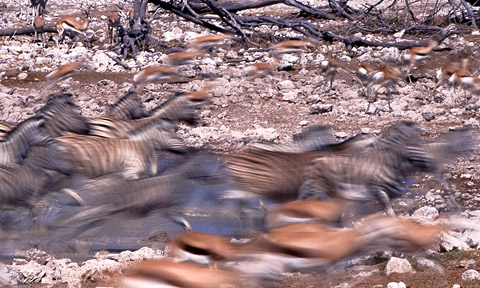
Practice your Pan Technique
Our advice is for you to practice photographing motion blurs before you go on safari. You can photograph cars, people walking, athletes running, your pet dogs running - there are so many subjects at home.
In the following B&H video, nature photographers Denise Ippolito and Arthur Morris cover the great variety of techniques that can be used to create pleasingly blurred images, mostly in-camera in the field, and at times, during post processing.
Topics that are discussed and illustrated include pan blurs, vertical panning blurs, zoom blurs, camera movement blurs including flame and jiggles, flash blurs, subject movement blurs including moving water blurs, long exposure blurs, the need for accurate focusing, managing your ISO settings, in-camera multiple exposures, subject to film plane orientation, the role of neutral density and polarizing filters when creating pleasing blurs, choice of shutter speeds and how subject-to-sensor distance affects the degree of blurring.
Denise and Arthur co-authored the very popular eBook, “A Guide to Pleasing Blurs.”
Return from Panning to Safari Photo Tips
Return from Panning to Wildlife Photography page
To make a safari rental booking in South Africa, Botswana or Namibia click here
"It's 764 pages of the most amazing information. It consists of, well, everything really. Photography info...area info...hidden roads..special places....what they have seen almost road by road. Where to stay just outside the Park...camp information. It takes quite a lot to impress me but I really feel that this book, which was 7 years in the making, is exceptional." - Janey Coetzee, South Africa
"Your time and money are valuable and the information in this Etosha eBook will help you save both."
-Don Stilton, Florida, USA
"As a photographer and someone who has visited and taken photographs in the Pilanesberg National Park, I can safely say that with the knowledge gained from this eBook, your experiences and photographs will be much more memorable."
-Alastair Stewart, BC, Canada
"This eBook will be extremely useful for a wide spectrum of photography enthusiasts, from beginners to even professional photographers."
- Tobie Oosthuizen, Pretoria, South Africa
Photo Safaris on a Private Vehicle - just You, the guide & the animals!


New! Comments
Have your say about what you just read! Please leave us a comment in the box below.